Many thanks for purchasing the unique X1 terrace tile. We hope you will enjoy your new tile for many years and would like to advice to read the below carefully before you start the implementation of the terrace tile.
GENERAL
X1 is a unique terrace tile which combines the positive properties of a ceramic tile with a more increasing important need for your garden; storage and infiltration of rainwater. The tile contains two parts: a ceramic tile (the upper part) and the buffering and draining lower part. The X1 tile is very suitable to be used as a terrace tile in every garden.
1. CHECKING
Before you start laying; check if the supplied numbers are correct and if the article code, name, colour and size are correct. Check if damage has occurred. No claims can be made after installing the product.
2. INSTALLATION
Take good care when you install the tiles, ceramic tiles can be sensitive to damage if they bump into each other or onto other hard surfaces. Please make sure that the tile doesn’t tilt or is installed out of line.
The X1 tile can be easily installed on a sand surface. Install the tile if possible on a underground of backing sand or broken rubble, with a layer thickness of 25 cm (depending on usage and surroundings). After stabilizing the underground, add a top layer of 5 cm of fine sand. The fine sand is needed for a good infiltration of the water in the surface below. After stabilizing this once more, the sand bed can be levelled. The installation of the X1 tile on a flat surface is a must.
Other than installing a standard tile, the X1 tile doesn’t need to be installed on a pitched or raked surface for the rainwater to be guided to a drainage. For the best usage of absorbing the water the seams need to be kept open.
Every X1 tile has a unique structure and colour. Therefor it is important that you mix up different crates of tile to get an even spread of surface and colours. Please prevent moving tiles on to each other to prevent scratching. You cannot compact the tile. It is possible to make slight corrections with a rubber hammer.


3. LOCKING UP THE TILE TERRAS INTO FIXED POSITION
Make sure that the tile is locked up on all four sides. You can do this in different ways. The usage of restraint strips from 6×20 cm would be the most common way. (preferable install into concrete)
On the sides of the terrace, you need to put tile shims. This will fix your terrace and will prevent it from moving out of position. It is best to check the terrace after a couple of weeks and adjust the filling if needed to lock the tiles into their place.


4. EDGES / SIDES
- On the side where you start the installation, you have to cut off the sides of the lower part of the tile. You can easily do this with a small grinder.
- On the corners of your terrace, you need to cut of 2 or 3 sides (depending on the connections against the edging), from the teeth till approximately 2cm under the upper part. This allows you to easily slide the last tile into position.
- If you need to cut the tile to size, you may end up with none or just one plug. In such case you can fix the lower part to the upper part by applying polymer silicon. The plugs can easily be removed by pulling the plug. After applying the silicon, you can put back the plugs into their original position.
- Fixing the tiles can be best done by putting 2 or 3 mm fillings between the tiles and the edge of the terrace (see picture 4). These fillings can easily be pushed into position with a flat object. Please make sure that you do not damage the tile (e.g. don’t use screwdriver).
- After you finish the terrace installation, you can seal the edges with silicon. This will allow for extra safety. Please consider that you need to check the terrace a couple of weeks after installing to see if all the tiles are still fixed into position.


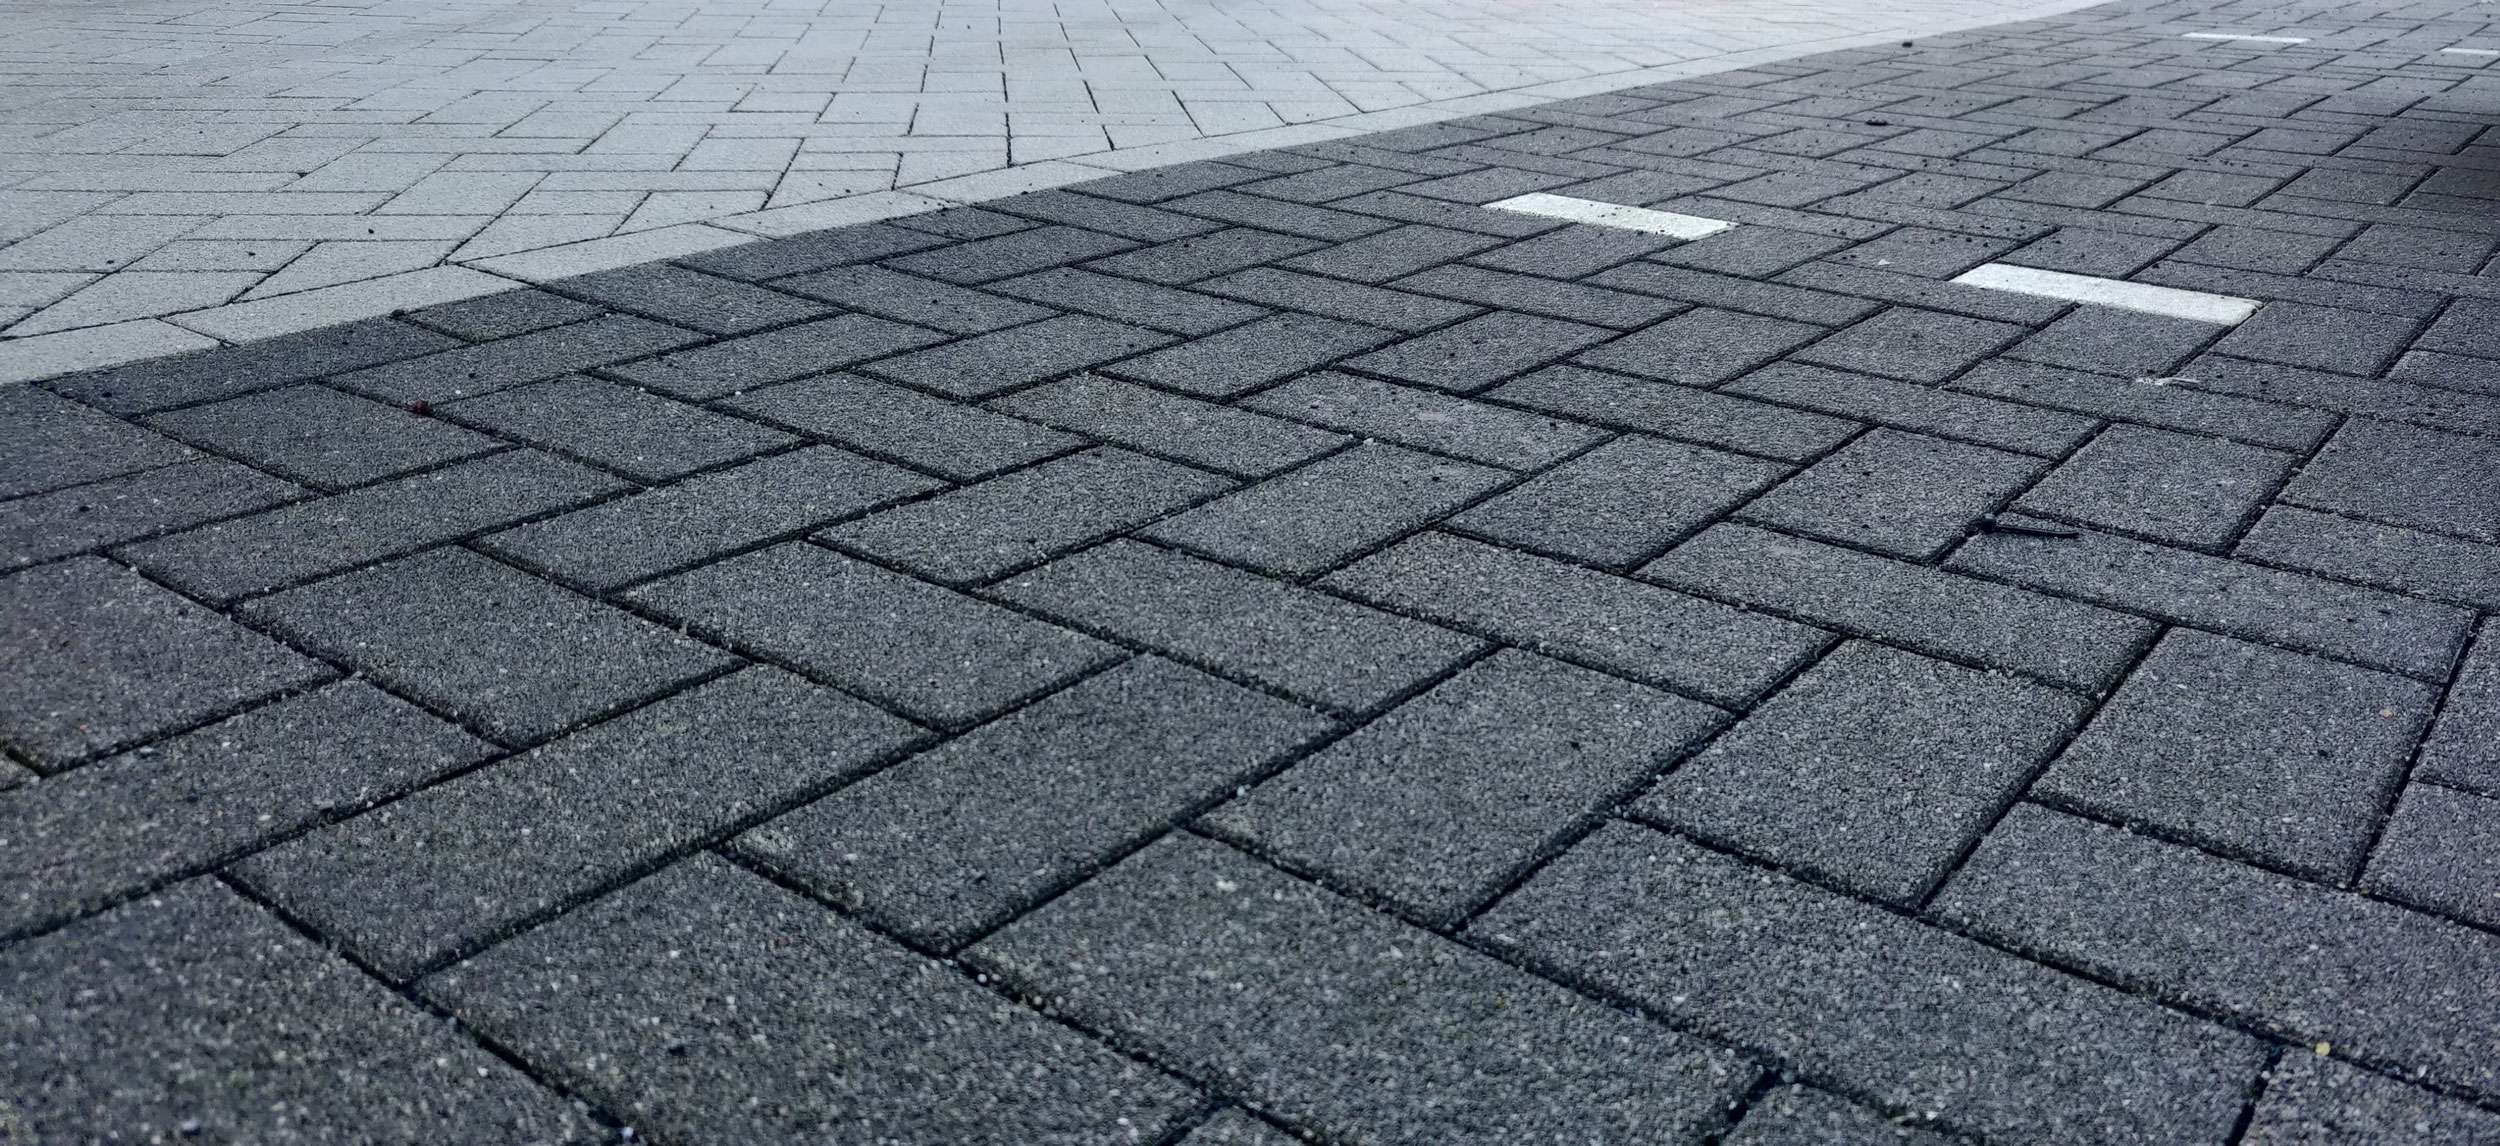
5. INSTALLING
- Please make sure that you always start laying the tiles straight and that you stay working straight during the whole process. The X1 tile is equipped with spacers on each side of the tile. This allows you to lay the tiles very easy and tight next to each other, automatically allowing a constant 3mm gap between the tiles. While laying the tile, it is essential that you always lay the tile diagonal in one direction (see picture). Important in this process is to watch out for the tiles to be installed tight (3mm) and without room in-between. This makes it easier to tighten the tiles as a last step.
- Please check the straight line regularly to make sure that your pavement is straight.
- The tile, based on synthetic material and a top layer of ceramic is very easy to cut to size in one go with a water-cooled saw. Please make sure that you never cut to size on site and also please make sure to clean the tile after you have the desired dimension.
- You may not pound hard on the tile. You are only allowed to make slight corrections with a rubber hammer when used directly on the tile and with very light force. This allows the tile to adjust when it is just a bit off. If doing so, please also check if the sand surface is still okay to continue.
- If you were to brake a tile, then it is easy to separate the tile and replace with a new one. Besides this, you can also just glue the tiles with Polymer kit on the specially designed kit islands.


6. CLEANING AND MAINTENANCE
The terrace is easy to clean with Stone and Tile cleaner or another suitable product. First clean the terrace with clean water. Using high pressure water cleaner (<100 bar) is no issue. Make sure you keep a minimal distance of 30-40 cm. After this, treat the tile with Stone and Tile cleaner and make sure to let it set for a couple of minutes before rinsing it with clean water. Green stain can be removed with the same method using algae cleaner or another suitable product. Despite that the ceramic tile is very scratch resistant, we advise garden furniture and flower pots to be fitted with felt. This is to prevent any scratching. To optimize the infiltration of water it is essential to clean the joint between the tiles once a year. You can either do this with a leaf blower, vacuum cleaner, brume or with a water hose (<100 bar) holding a minimal distance of 40 cm. We advise to clean with dry circumstances.
ADDENDUM PROCESSING ON BALCONY & ROOF TERRACE
1. RUBBER TILE SUPPORT
The X1 terrace tile allows for easy installing on balconies and roof terraces. For both situations you can apply rubber tiles supports to support the X1 tile.
These rubber tile supports are available in several thicknesses, which allows you to straighten the irregularities from your terrace.
We advise to use tile supports size 20x20cm on every corner of the tile and to spread/centralize. Please look at picture for clarification.
2. ALUMINUM SIDE FIXING
When you don’t have a wall connection, just use aluminum angle profiles with size 4×4 cm. You can choose to take a colour that suits you.
After you have cut of the interlocking system of the synthetic underlayer with a grinder, you can easily mount the aluminum angles with stainless screws. You have to make sure you use 2 per side of the synthetic tile part. The screws need to be long enough to go through the synthetic tile part and need to be as short so it will no touch the tile.
The frame work that the angle profiles will present makes a nice finish and will make sure that the tiles do not move.
3. FINISH WITH FREE DRAINING GRAVEL / SAND
When you do not wish to cover your whole terras, you can also make use of free draining gravel or sand.
Look at the picture as per example.


Installing step 1 to 10


Get in contact
Our customer service is available 7 days a week.